
Top 10 Phone Repair Mistakes People Make — And How to Avoid Them
We see thousands of phones come through our shops. Many arrive in worse condition than they needed to be — because well-meaning owners made avoidable mistakes. Here’s what to avoid.
1. Waiting Too Long to Get Repairs
You crack your screen but think “I’ll wait until it gets worse.” Small problems become big, expensive ones.
- Small screen cracks spread across the entire display
- Singapore’s humidity causes moisture to seep through cracks and damage internals
- Degraded batteries can swell — which is a safety risk
Get repairs done as soon as issues appear. A crack that takes 30 minutes and costs $80 to fix today could become a $300 display replacement next month.
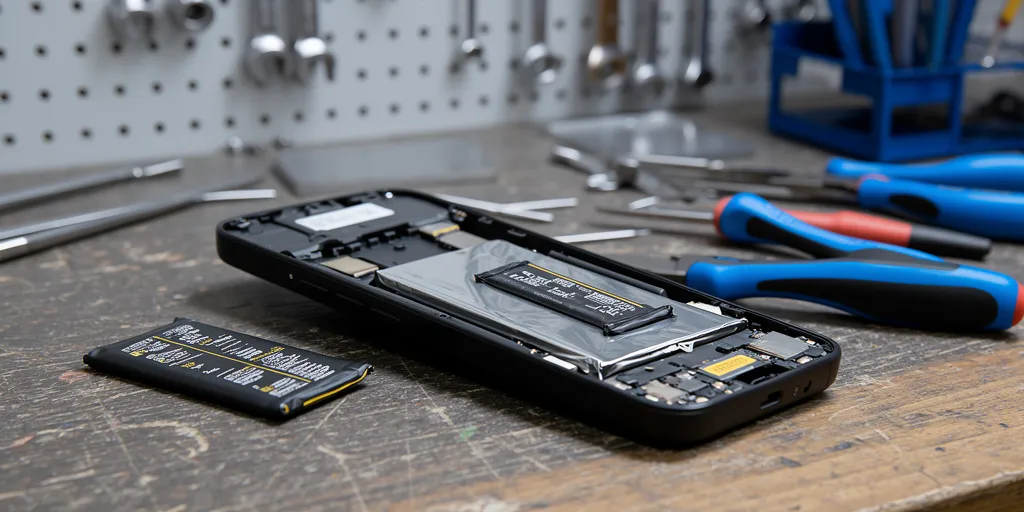
2. DIY Repairs Without Proper Tools or Experience
You watch a YouTube video and order cheap parts from Shopee. What could go wrong?
- Modern phones have delicate flex cables that tear with one wrong move
- Face ID and Touch ID sensors are cryptographically paired to your phone — damage them and they’re permanently disabled, with no fix available
- Adhesives require specific temperatures and techniques
- Cheap replacement parts often fail within weeks
A customer bought an aftermarket iPhone screen online and damaged the Face ID connector during DIY installation. The repair that would have cost $150 became a $500 job — with Face ID permanently disabled.
3. Using a Hair Dryer on a Water-Damaged Phone
Your phone gets wet. Someone says “dry it with a hair dryer!” This is one of the worst things you can do.
- Heat melts internal adhesives and damages components
- Forced hot air pushes water deeper into the device
- Can cause the battery to swell
What to do instead: Power off immediately. Don’t charge it. Don’t try to turn it on. Bring it to a repair shop as soon as possible for professional cleaning.
4. Choosing a Repair Shop Based on Price Alone
You see “$50 iPhone screen repair!” and assume a deal. Suspiciously cheap repairs usually come with poor-quality parts and no real warranty.
- Cheap screens often have: dead pixels within weeks, dim display, ghost touches, washed-out colours
- No warranty or a “90-day warranty” that’s never honoured
- Inexperienced technicians who damage other components during repair
Before any repair: “What grade of parts do you use?” and “What exactly does your warranty cover?” A shop that can’t answer clearly is a shop to avoid.
5. Not Backing Up Before Repair
You drop off your phone without backing up. During repair, something unexpected happens and data is lost.
Screen and battery repairs rarely affect data. But motherboard repairs carry real risk. Photos of family, business documents, years of messages — these are irreplaceable.
iPhone: Settings → [Your Name] → iCloud → iCloud Backup → Back Up Now.
Android: Settings → Google → Backup → Back up now. Takes 5 minutes and is always worth doing.
6. Continuing to Use a Visibly Damaged Phone
A cracked screen with tape over it. A battery that’s clearly swollen. These aren’t just cosmetic issues.
- Cracked screens cut fingers and let moisture into the internals
- Swollen batteries can catch fire — this is a genuine safety risk, not a remote possibility
- Broken charging ports can cause electrical shorts when forcing a cable in
7. Trusting the Rice Method for Water Damage
Rice absorbs moisture from the air. It does not absorb water from inside a phone. The rice myth wastes 24–48 critical hours while corrosion progresses inside your device.
By the time you give up on rice and bring the phone in, corrosion has had two full days to spread across the logic board. Water damage treated within hours has a far higher success rate than water damage treated after a day of sitting in rice.
8. Not Asking About Warranty Before the Repair
You get your screen repaired. Two weeks later it develops issues. The shop says “sorry, no warranty.”
Always confirm before paying: how many days warranty, what’s covered (parts and workmanship), and what voids it. Get a receipt with warranty terms written on it. Any reputable shop will have no problem providing this.
9. Ignoring a Failing Battery
Battery drains fast, phone overheats, shuts off randomly. You think “it’s just old” and carry a power bank everywhere.
A degraded battery isn’t just inconvenient — iOS and Android actively throttle CPU speed to prevent unexpected shutdowns caused by weak batteries. Your phone feels slow because of the battery, not because of the processor. A battery replacement restores both battery life and performance.
10. Accepting Repairs Without Understanding What’s Wrong
You bring your phone in for a screen repair. The technician says you also need a charging port replacement and motherboard cleaning for $300 more. You agree without questioning.
- Ask: “Can you show me what’s wrong?”
- Ask: “What happens if I don’t fix this other issue now?”
- Ask: “Can I just do the screen first?”
A trustworthy shop will give clear answers. If a shop pressures you to agree to extra repairs on the spot without explanation, get a second opinion.
Red Flags at Repair Shops
- No upfront price estimate — quote only given after they “open it up”
- Needs 5–7 days for repairs that take 60 minutes everywhere else
- No warranty offered
- Only accepts cash, no receipt
- Significantly cheaper than all other shops
- Pressures you to agree to additional repairs immediately
Need an honest repair?
Free diagnostics, Grade A parts, 60-day warranty. We tell you exactly what’s wrong before any work starts.
Westgate · AMK Hub · Bugis Village · Bedok Mall · 11am–9pm daily